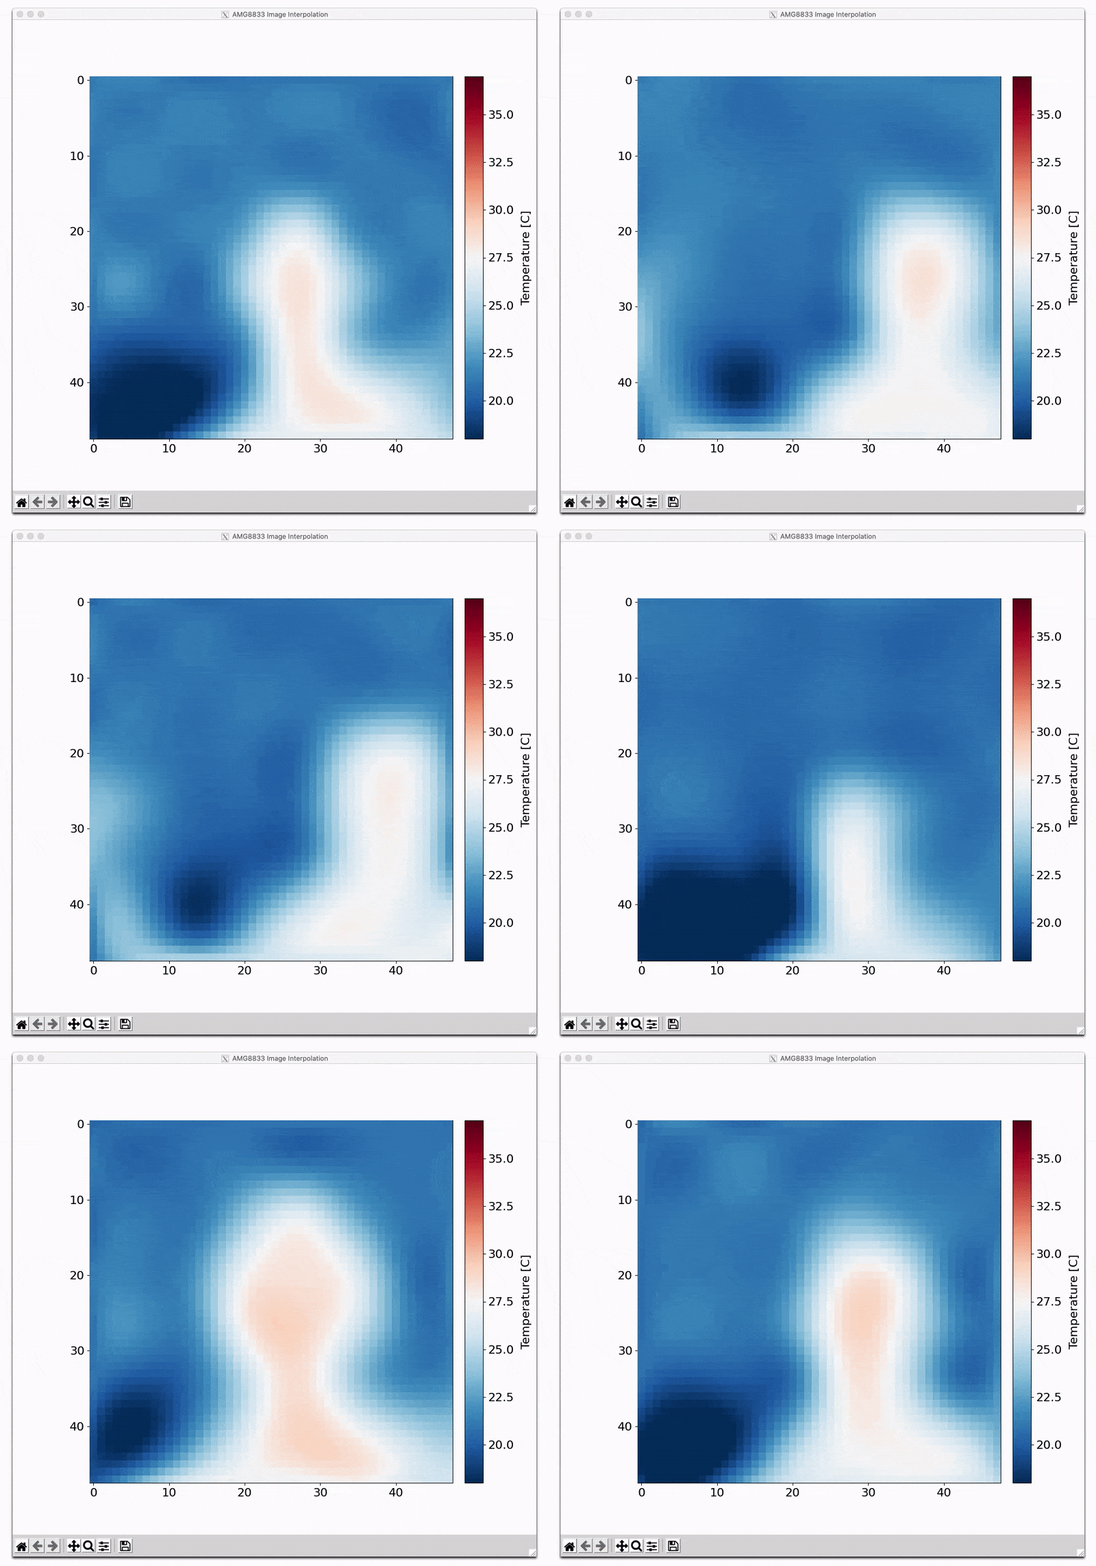
Building a basic thermal camera at home will produce a rudimentary design and can not compare to our commercial off the shelf thermal solutions but it will be a very fun and unique educational process. Here’s a step-by-step guide to create a basic thermal camera using an off-the-shelf thermal sensor module and a microcontroller:
1. Components:
Components :
- Components for a Simple Thermal Camera:
- Thermal Sensor Module:
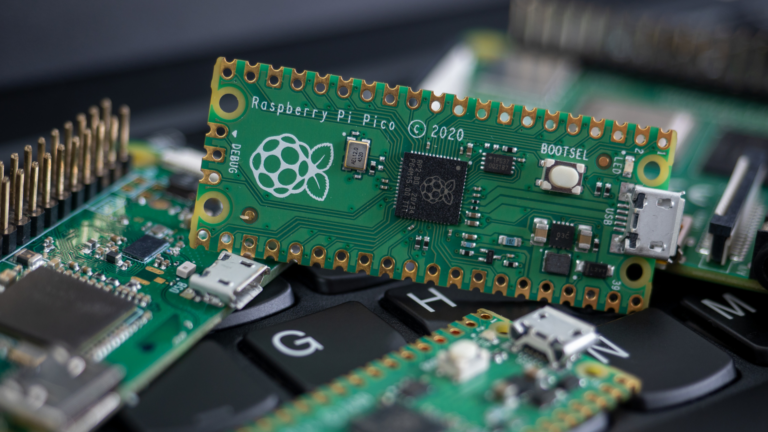
- Microcontroller with Display:
- Power Source:
- For Arduino:
- USB Power Bank: 5V output with at least 2A capacity. Brands like Anker, RAVPower, or Xiaomi are recommended.
- 9V Battery with a Barrel Jack Connector: Standard 9V battery with a 2.1mm x 5.5mm barrel jack connector.
- For Raspberry Pi:
- USB-C Power Adapter (for Raspberry Pi 4 and newer): Official Raspberry Pi USB-C power adapter or equivalent, providing 5V at 3A.
- Micro USB Power Adapter (for Raspberry Pi 3 and older): Official Raspberry Pi Micro USB power adapter or equivalent, providing 5V at 2.5A.
- For Arduino:
- Cables & Connectors:
- Jumper Wires: Depending on the connection points of your sensor and microcontroller, choose from male-to-male, female-to-female, or male-to-female jumper wires.
- Power Cables: USB cables for the power bank or adapters for Raspberry Pi, and barrel jack connectors for Arduino if using a 9V battery.
- Optional: Dupont or Grove connectors for more secure or organized connections.
- Enclosure:
- A plastic box or a 3D-printed case.
- Modifications might be needed for sensor visibility, access to ports, or ventilation.
- Optional Components:
- Buttons/Switches: For user input or to power the device on/off.
- LEDs: Indicators for power or device status.
- Passive Components: Resistors, capacitors, etc., if needed for specific circuit configurations.
- Heat Sink or Cooling: Especially if using a Raspberry Pi.
- External Storage: SD card module for Arduino or an SD card for Raspberry Pi, if saving images or logging data.
2. Steps:
a. Connect the Thermal Sensor:
- Step 1: Connecting the Thermal Sensor to the Microcontroller
- 1.1. Identify the Pins:
- Begin by identifying the pins on your thermal sensor module. Common pins you’ll find on modules like the MLX90640 or AMG8833 are:
- VCC (Power)
- GND (Ground)
- SDA (Data for I2C communication)
- SCL (Clock for I2C communication)
- Also, identify the corresponding pins on your microcontroller:
- For Arduino:
- 5V or 3.3V (Depending on your sensor’s requirements)
- GND
- A4 (SDA for many Arduino boards)
- A5 (SCL for many Arduino boards)
- For Raspberry Pi:
- Pin 1 or Pin 17 (3.3V)
- Pin 9 (GND)
- Pin 3 (SDA)
- Pin 5 (SCL)
- For Arduino:
- 1.2. Make the Connections:
- Using jumper wires:
- Connect the VCC pin on the sensor to the appropriate power pin (either 3.3V or 5V) on the microcontroller.
- Connect the GND pin on the sensor to a GND pin on the microcontroller.
- Connect the SDA pin on the sensor to the SDA pin on the microcontroller.
- Connect the SCL pin on the sensor to the SCL pin on the microcontroller.
- 1.3. Secure the Connections:
- Ensure that all connections are secure and there’s no risk of short-circuits.
- If using jumper wires with pin headers, they should snap securely into place.
- If you’re soldering, ensure all joints are well-formed and there are no “cold” solder joints.
- 1.4. Double-Check:
- Before powering on, double-check all connections to ensure correctness.
- Ensure power (VCC) and ground (GND) are correctly connected and not reversed.
- Verify that SDA and SCL are connected to their respective counterparts and not swapped.
- Now that the thermal sensor is connected to the microcontroller, you can proceed with powering on the system and programming the microcontroller to communicate with the sensor. Remember, always be cautious when working with electronic components to avoid damage or injury.
Step 2: Set Up the Software
2.1. Install the Necessary Libraries:
- For Arduino:
- Open the Arduino IDE.
- Go to
Sketch > Include Library > Manage Libraries. - In the Library Manager, search for the sensor’s name, either “MLX90640” or “AMG8833”.
- Find the appropriate library in the search results and click “Install”.
- For Raspberry Pi:
- Open a terminal window.Use
piporpip3to install the necessary libraries. For example:Copy codepip3 install mlx90640-library
pip3 install amg8833-libraryNote: These are generic library names. The actual library names might differ. Check the respective sensor’s documentation or GitHub repositories for exact installation instructions. Here is a link to a library with supporting python code for a real time thermal imaging camera using raspberry pi and amg8833. - Open a terminal window.Use

2.2. Write or Download the Program:
- For Arduino:
- You can find example sketches included with the library you installed. Go to
File > Examplesand find the library name to see available examples. - Open the appropriate example that reads data and displays it. This will serve as a starting point.
- You can find example sketches included with the library you installed. Go to
- For Raspberry Pi:
- Navigate to the library’s GitHub repository or official documentation. Often, they provide sample Python scripts or programs.
- Download the sample scripts or clone the repository to your Raspberry Pi.
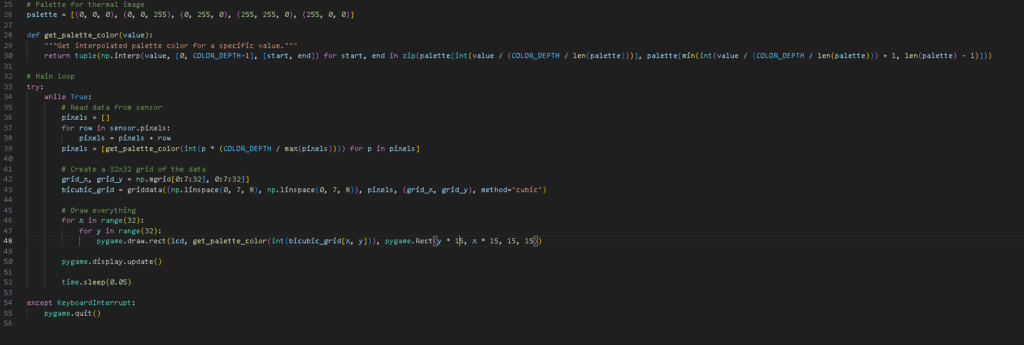
2.3. Implement Colormap or Heatmap Generation:
- For Arduino:
- Within your sketch, after obtaining temperature values, use the library’s functions or your own logic to map each temperature value to a color.
- Display the colors on the screen in the appropriate position corresponding to the sensor’s pixel or cell.
- For Raspberry Pi:
- In your Python script, after reading the temperature values, use available colormap functions or libraries like
matplotlibto generate a heatmap. - Display the heatmap on your screen using libraries like
pygameor a GUI framework of your choice.
- In your Python script, after reading the temperature values, use available colormap functions or libraries like
Example Code I used:
pip3 install adafruit-circuitpython-amg88xx pygame


3.1. Program the Continuous Reading Loop:
- For Arduino:
- Within your
loop()function in the Arduino sketch, ensure that you have commands to continually read data from the thermal sensor. - After reading the data, process and map the temperature values to colors using the colormap function.
- Refresh the display with the updated thermal image.
- Within your
- For Raspberry Pi:
- In your Python script, utilize a
while True:loop (or another looping mechanism) to keep reading data from the thermal sensor. - After fetching the data, utilize the colormap functions or libraries to translate temperature readings into a visual representation.
- Update the display with the new thermal image, ensuring the screen refresh rate is suitable for real-time updates.
- In your Python script, utilize a
3.2. Consider the Resolution:
- Based on the sensor’s resolution:
- Each pixel or group of pixels on the display should correspond to a specific temperature reading from the sensor. For example, if the sensor has a 8×8 resolution, and the display is 64×64 pixels, each temperature reading would be represented by an 8×8 pixel block on the display.
- Scale and adjust the displayed image accordingly to ensure the entire screen is utilized and the thermal image is clear.
3.3. Real-time Responsiveness:
- Test the real-time responsiveness of the system:
- Move the sensor to focus on objects with varying temperatures and observe how quickly and accurately the display updates.
- Ensure there’s no significant lag between the actual temperature change and the display update.
3.4. Adjustments and Optimization:
- Depending on the performance, you might need to:
- Optimize the code for faster readings and display updates.
- Adjust the colormap logic for clearer differentiation between temperature ranges.
- Consider introducing features like a dynamic range, where the colormap adjusts based on the current range of temperatures detected, highlighting variations more effectively.
By the end of this step, you should have a thermal camera that provides real-time thermal imaging, updating continuously as you move the sensor around or as temperatures of objects in its field of view change.
Calibration and Additional UI:
Before we proceed to the enclosure, there are a couple of considerations:
- Calibration: Depending on the accuracy you desire, you might want to introduce a calibration step. Calibrating your camera against known temperature sources will improve its accuracy. Calibration can be done before enclosing to ensure the sensor’s readings are accurate.
- User Interface (UI): If you want to include any buttons, switches, or additional LEDs for user input or indicators, you’d need to integrate and test those components first. This could include power on/off switches, buttons to save a snapshot of the current thermal image, or LEDs to indicate battery status or other operational states.
- Battery Integration: If you’re planning to make the camera portable and use a battery as the power source, you might want to integrate and test the battery setup. This includes ensuring the battery provides stable power, integrating any necessary voltage regulators, and setting up charging mechanisms if using rechargeable batteries.
If you feel confident that the software is working as expected, the calibration is satisfactory, and there are no additional UI or power elements to add, then you can proceed to designing and building the enclosure. Otherwise, these additional steps should be addressed before moving on to the enclosure.
Step 4: Building the Enclosure
Designing an effective enclosure not only protects the components but also ensures ease of use and optimal sensor performance. Here’s how you can approach it:
4.1. Design Considerations:
- Material: Choose a material that is sturdy enough to protect the components but lightweight for portability. Common materials include plastic, acrylic, or even 3D-printed filament.
- Sensor Window: Ensure the sensor has an unobstructed view. You can cut out a small window or use a material that’s transparent to infrared (IR) radiation.
- Ventilation: If using a Raspberry Pi or another powerful microcontroller, ensure there’s ventilation to prevent overheating.
- Access Points: Design the enclosure so you can easily access power ports, SD card slots, and any other interfaces you might need.
- User Interface: If you have buttons, switches, or LEDs, ensure they are accessible and clearly marked.
4.2. Designing and Building:
- Sketch: Start with a rough sketch of the enclosure, marking the positions for all components, access points, and the sensor window.
- Dimensions: Measure the dimensions of your components to ensure they’ll fit inside the enclosure.
- Cutting and Assembling:
- Pre-made Box: If using a pre-made plastic box, you can cut out necessary windows, holes for buttons, or ventilation using tools like a drill or a Dremel.
- 3D Printing: If you have access to a 3D printer, design the enclosure using software like Tinkercad, Fusion 360, or Blender. Then, print the design, ensuring the print settings match your requirements (e.g., infill percentage for strength).
- Acrylic: If using acrylic sheets, you can cut and shape them using a laser cutter or by hand, and then bond them together using acrylic cement.
4.3. Assembly:
- Mount Components: Securely mount the microcontroller, sensor module, display, and any other components inside the enclosure using screws, standoffs, or adhesive.
- Finalize Connections: Ensure all internal connections (like those from buttons or LEDs to the microcontroller) are secured.
- Close the Enclosure: Once all components are in place, seal the enclosure. If you’ve designed it with screws, make sure it’s tightened. If it’s a snap-fit design, ensure it’s securely closed.
4.4. Testing:
- Power On: Once everything is enclosed, power on the device to ensure everything still functions correctly.
- Sensor Test: Point the thermal camera at various objects to ensure the sensor window isn’t obstructing or distorting the readings.
- UI Test: Test any buttons, switches, or LEDs to ensure they’re functioning and are easily accessible.
4.5. Adjustments:
- Depending on the test results, you might need to make adjustments:
- Enlarging Windows: If the sensor’s view is obstructed.
- Improving Ventilation: If components overheat.
- Repositioning Components: If there are ergonomic issues or if components interfere with each other.
By the end of this step, you should have a fully enclosed, functional, and portable thermal camera. Always remember, the design and build process often involves iterations, so don’t be discouraged if adjustments are needed. Each iteration will bring improvements to your design.
Step 5: Final Touches and Sharing with Loved Ones
After building and testing your thermal camera, it’s time to finalize it and proudly show it off to family and friends!
5.1. Calibration and Final Testing:
- Quick Calibration: While precision might not be the primary goal, do a basic calibration with objects of known temperatures around the house to ensure reasonably accurate readings.
- Performance Check: Have a little fun! Test the camera on various household items, pets, or even family members to see how it performs. Make sure it operates smoothly.
5.2. Prepare a Quick Guide:
- Basic Operations: Jot down or mentally note the steps to power on the device and how to use it. This will make it easier when showing it to others.
- Cool Features: If your camera has any special features or settings, remember to demonstrate them. It’ll surely impress your audience!
5.3. Sharing with Family and Friends:
- Demonstration: Have a little demonstration session. Gather your family and friends and show them how the camera works. Let them try it out and see their reactions.
- Stories & Background: Share the process and inspiration behind creating the thermal camera. Discussing the challenges faced and the learning experience can be both entertaining and educational.
5.4. Storing the Camera:
- Safe Storage: Even though it’s a fun project, ensure you store the camera in a safe place where it won’t get damaged. A soft pouch or a dedicated spot on a shelf could work.
- Maintenance: Every now and then, especially if you’re showing it off, make sure it’s free from dust and the battery (if applicable) is in good condition.
By completing this step, you’ve not only built something cool but also have a unique gadget to show and share with your loved ones. Enjoy the reactions, answer the curious questions, and take pride in your creation. Well done!
This basic setup will give you a rudimentary thermal imaging camera. It won’t have the resolution or features of commercial units, but it’s a fun and educational project that provides insight into how thermal cameras work.
